Monthly Archives: September 2012

teaching kids (and yourself!) how to excel at public speaking

by Jessica Reynolds and Elizabeth Cossick, M. Ed. 

Comment on this post and be entered to win a $20 School Box gift card. 

Did you know that when polled, Americans consistently rank public speaking as their number one fear, even above death (which is number two)? Why all the willies? Well, lots of reasons: fears of freezing up, going blank, being the center of attention, losing face….

So, when teaching our youngsters how to speak in front of others, we need to minimize fears and bolster confidence. Here’s how:

1. Pick an engaging topic. 

Whenever you are asked to speak, the organizer of the event will likely assign you a general topic to talk about, but you can present a clever or creative perspective or angle. Just because they tell you to talk about gardening, for example, doesn’t mean you have to give a step by step tutorial. Most people know how to plant a garden, but fewer people know secrets of fertilizing or the different fertilizing options. Maybe talk about starting a neighborhood share program where participants bring their fruits of their labor and mix up what is there, each taking a portion of what everyone contributes.

Opting for a creative approach will make you feel more confident in your material, and will also result in a highly engaged audience. 

2. Write out a plan. 

Put your speech into writing, even if you plan to talk off-the-cuff without reading your notes. Here’s how to start your plan:

Come up with a catchy beginning:

The beginning can be something like a joke, ice breaker or anecdote. In order to gain the audience’s attention, you need to make an impression in under one minute or people will begin to tune you out. Grab them early on and hold their attention for the duration!

Put the meat in the middle:

The middle of your speech should be the meat and potatoes of what you have to say. Use strong word imagery to connect with your audience. Visual aids can help you stay on point, like posters or PowerPoint. But, don’t write your speech entirely using these aids, or you will end up reading from your slides…a sure snooze-alert! Know your stuff, and present it communicatively with enthusiasm and animation. It’s also a good idea to make sure your visuals are easy to read at a distance.

Leave an impact with your ending:

Your conclusion should make an impact. It should touch the emotions of people in some way that they will always remember what you told them.

If you are speaking on gardening and composting, you can end with a story about how you learned to garden from your late grandmother, for example. Ending with a personal story makes what you have to say special and full of thought. Then, when people leave, they’ll take your knowledge with them–both because you presented it expertly and because you inspired them with a memory of your own. 

3. Prepare for all variables. 

As with anything, be prepared for the unpredictable. Think about all the variables that could hinder you from giving your speech. Technical glitches usually rank among the top snafus, so have a back-up plan just in case there are electronic malfunctions. You worked hard on this! Your words need to be spoken!

Then, dress for the occasion and be confident. Speak up! No one wants to struggle to hear you, nor do they want to look at a messy messenger. A crisp, clean appearance and well enunciated words will make you all the more successful.

And afterwards, celebrate! Congratulate yourself on a job well done. 

Jessica Reynolds loves spending time with her family and living life through photography and art. She has spent considerable time running her own businesses while raising her kids. Currently, she blogs for postersession.com.

Comments Off on teaching kids (and yourself!) how to excel at public speaking

Filed under Academic Success, Reading, technology

Comment Winner!

We have a lucky comment winner who just won a $20 gift card to The School Box simply for commenting on one of the posts on A Learning Experience. Congrats, Sahara!

Original Comment: 

On post: “Best Teacher Organization Ideas, Part I”

Author: Sahara Jordan- Georgia

Comment:

Wow! What a great idea! Now I can really organize that drawer full of supplies on my desk “that I thought was organized ” lol. I’m going shopping for a toolbox… thanks for the wonderful idea Elizabeth! I can’t wait for the other posts. :)


Comments Off on Comment Winner!

Filed under Uncategorized

Best Teacher Organization Ideas, Part III

by Elizabeth Cossick, M. Ed. 

Comment on this post and be entered to win a $20 School Box gift card. Just for sharing a lil’ ol’ comment. 

In this series, we’ve compiled our favorite classroom organization ideas to share with you. We shared a great idea for teacher toolboxes in the first post here. And a great idea for over-the-door shoe organizers here.

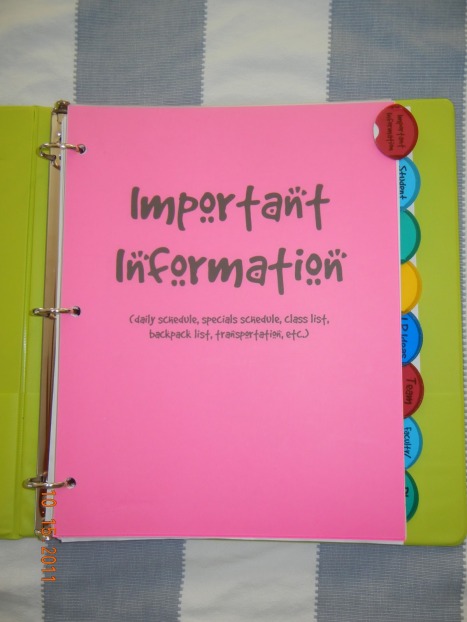
And now here’s another winner: a teacher organizational binder that will be your new BFF.

This idea is from Jenn Rivera, a third grade bilingual teacher and blogger at Beyond the Grades. Thanks, Jenn! LOVE this!

Inside pocket: a small monthly calendar book. 

TABS:

Important Information: schedules, class list, transportation. All very handy stuff for a sub.

Student Data: This section is extra handy. I keep contact information, conference times, assessment scores (important ones not all).

I use this student information sheet in my student data section. It’s from Busy Teachers Cafe. Click the link or the picture; it’ll take you directly to a downloadable pdf.

 Calendars: Curriculum calendar and testing calendar.

Grades: I keep the district’s grading requirements as well as a spreadsheet with my grades for the 9 weeks. No more grading book!

Lesson Plan Ideas: A place to keep those great lesson ideas that you hear/print/pin but haven’t incorporated, yet!

The next three sections are where I keep documentation and notes from various meetings: 

Back Pocket: I keep an EZ Grader for grading at home. {Find one here.} 

Click here for the font used on cover sheets. 

Substitute Teacher Binder

Jenn’s teacher binder is so great, we thought it would be a good idea to create a substitute teacher section or binder to accompany it. The sub binder could be kept in a separate binder or it could simply be a section all to itself within your teacher binder. And, of course, since cute is always better, we particularly favored this adorable FREE printables pack from Think-Share-Teach.

Click the picture to access a downloadable file of these cutie pages:

She also offers a pink version and a purple version. (Yes, she’s that cute.)

Have you picked up some good organizational ideas from our series? Sure hope so. If you have great ideas of your own, consider writing a post for A Learning Experience. You can learn how to submit your idea here. If we publish your idea, you score fame, publicity and a $35 School Box gift card. Woot!

2 Comments

Filed under Classroom Organization, Free Stuff!, Organization

Best Teacher Organization Ideas, Part II

by Elizabeth Cossick, M. Ed. 

Comment on this post and be entered to win a $20 School Box gift card. Just for sharing a lil’ ol’ comment. 

Every teacher knows that trying to manage a classroom without organizational systems in place is just plain foolishness. So, we’ve been compiling our favorite classroom organization ideas to share with you during this series. {To see the ingenius idea from the first post, click here.}

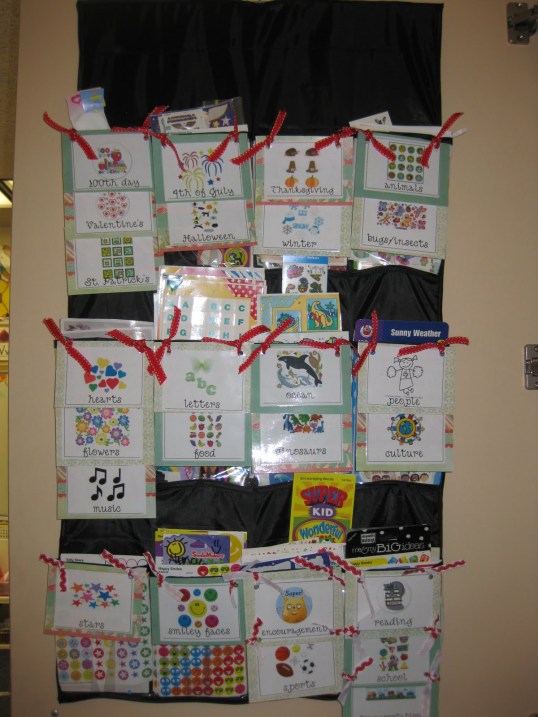
In our quest for the best ideas, we found creative uses for over-the-door shoe holders. Now these magical pocketed do-alls can be used to organize just about anything, but we loved how Miss Kindergarten (adorable blog, btw) used a shoe organizer to categorize the mountains of stickers that were taking over her classroom.

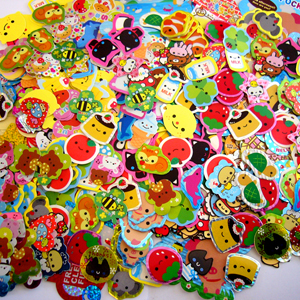
“As a Kindergarten teacher I have a ton, and I mean a TON of stickers! More and more keep popping out of random places in my room,” she says. “It was driving me absolutely nuts finding adorable stickers that I didn’t even know I had after said holiday. So I decided to face those stickers and show them who’s boss!”

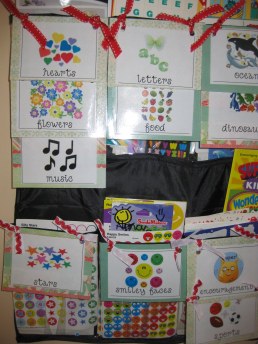
Here’s her shoe organizer-turned-sticker file:

Here’s how she did it:

Step one: Tackle Those Stickers

Pile all of your stickers into one huge mountain. :)

Step two: Categorize

Organize the stickers into broad but relevant categories like encouragement, sports, Christmas, fall, culture, letters, stars, hearts, reading, and science. Once you have your piles organized, label each pile with a sticky note.

Step three: Make Cute Labels

Create labels on the computer in a cute font (one for each sticky note), mount them on construction or scrapbook paper, and laminate them.

Step four: Attach Labels

Attach labels to your shoe organizer with cute ribbon and a hole punch.

Step five: Fill the Pockets

Put stickers in correct pocket and never forget about cute stickers again!

Miss Kindergarten found her shoe organizer in the Target dollar section, but we found some pretty inexpensive versions online here and here.

Source:

www.miss-kindergarten.com

5 Comments

Filed under Classroom Decor, Classroom Organization